Homeyduino multi sensor: Co2-LDR-DHT11 [English version]
![Homeyduino multi sensor: Co2-LDR-DHT11 [English version]](https://huisvanvandaag.nl/wp-content/uploads/2021/01/Multi-sensor-Homeyduino-Co2-LDR-DHT11-.jpg)
This time we’ve build a new Multi sensor, a combination between a CO2-, light-, temperature- and humidity sensor that works with Homey and Homey Bridge.
First a short explanation about the importance of good humidity and the dangers of high CO2 levels on your health.
The importance of good humidity
Good humidity has a direct influence on how you feel. For example, too low humidity will cause:
- Dry skin and throat, burning eyes, chapped lips
- Headache, fatigue and problems with concentration
- Shrinking or tearing of wooden furniture and floors
While too high humidity can cause:
- Increase in bacteria and fungi in yourhome
- Swelling or rotting of wooden furniture, window frames and floors
- Overheating within the human body
- Higher costs of heating: heating moist air costs more energy than heating dry air.

All-in-one Co2 sensor on Amazon.com
DIY Co2 Multi sensor on Amazon or Aliexpress
Amazon you will find the MH-Z19B sensor for around $ 25, combine that with an LDR and a DHT11 sensor , a Wemos D1 for a few dollars and for an amount of $ 40 you have a multi sensor that not only measures , but can also communicate and trigger things in your Smart Home. To make this work, we use Homeyduino , the handy link between Arduino and Homey .
If you prefer to buy on Aliexpress, you can use these links:
Measuring with Homey Insights
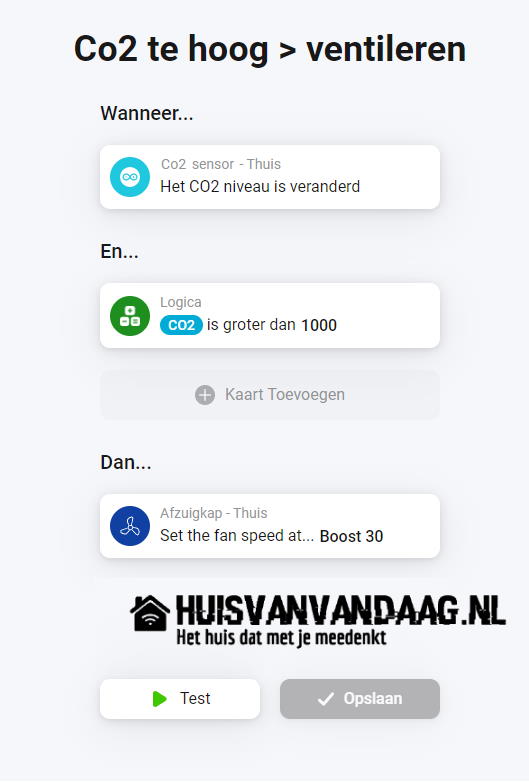
In this way you can monitor the course of the humidity and CO2 concentration via Homey Insights, and you can use your DIY sensors as a trigger for your flows. For example, by automatically controlling your mechanical ventilation .

Supplies
- Microcontroller with WiFi and 5V: D1 Mini NodeMcu
- Micro USB Charger
- MH-Z19B CO2 sensor
- LDR sensor
- DHT11 sensor
- Homey Smart Home HUB with Homeyduino app installed
Also necessary, but only to be configured once, a computer or laptop with the following programs installed:
- Arduino IDE
- NodeMcu Flasher
- Homeyduino (installed on your Homey or Homey Bridge)
How to connect sensors with Arduino board
Follow the diagram and image below to connect the sensor to the Wemos D1 Mini.

CO2 sensor code
Below you will find the code, just like the other Homeyduino projects , uploading is done via Arduino IDE terminal , if you are not familiar with this, read here for an extensive manual . Make sure you have selected the correct board in settings in Arduino IDE and that you upload the code at 9600 baud. The sketch also contains some code to read the measurements via UART. However, we are not using this method in this situation, we only read the sensor via PWM.
// Code for Homeyduino made by Smart Home Blog https://huisvanvandaag.nl.
// Take a look at my site for more Homeyduino en other Smart Home projects.

#include <ESP8266WiFi.h>
#include <WiFiClient.h>
#include <Homey.h>
#include <SimpleDHT.h>
#include <SoftwareSerial.h>
#include <MHZ.h>

#define PIN_DHT D4 // DHT11
SimpleDHT11 dht11; // DHT11

#define CO2_IN D2 // D2 19 // Co2
#define MH_Z19_RX D6  // Co2
#define MH_Z19_TX D5  // Co2
MHZ co2(MH_Z19_RX, MH_Z19_TX, CO2_IN, MHZ19B); // Co2

unsigned long previousMillis = 0; // DHT11
const unsigned long interval = 10000; //Interval in milliseconds // DHT11

int LDRsensor = A0; // LDR

void wifi() {
  if (WiFi.status() != WL_CONNECTED) {
    WiFi.begin("<SSID>", "<PASSWORD>"); // Enter WiFi netwerk and password
    uint8_t timeout = 30;
    while (WiFi.status() != WL_CONNECTED) {
      delay(500);
      Serial.print(".");
      if (timeout<1) break;
    }
    if (WiFi.status() == WL_CONNECTED) {
      //Print IP address
      Serial.print("Connected to WiFi! (");
      Serial.print(WiFi.localIP());
      Serial.println(")");
    }
  }
}

void setup() { // DHT11
  Serial.begin(9600);
  Homey.begin("LDR-DHT11-Co2 Multi-sensor");
  Homey.setClass("sensor");
  Homey.addCapability("measure_humidity"); // DHT11
  Homey.addCapability("measure_temperature");// DHT11
  Homey.addCapability("measure_co2"); // Co2
  pinMode(CO2_IN, INPUT); // Co2
  Homey.addCapability("measure_luminance"); // LDR
}


 void  co2loop() { // void voor Co2
  wifi(); // Beide
  Homey.loop(); // Beide
  int ppm_pwm = co2.readCO2PWM();
  Serial.print("PPMpwm: ");
  Serial.print(ppm_pwm);
  Homey.setCapabilityValue("measure_co2", (int) ppm_pwm);

Serial.println("\n------------------------------");
  delay(5000);
 }


void dhtloop() { // void voor DHT11
  wifi(); // Beide
  Homey.loop(); // Beide
   unsigned long currentMillis = millis(); // DHT11
  if(currentMillis - previousMillis > interval) { // DHT11
    previousMillis = currentMillis; // DHT11
    updateSensor(); // DHT11
  }
}

void updateSensor() { // DHT11
  byte temperature = 0; // DHT11
  byte humidity = 0; // DHT11
  int err = SimpleDHTErrSuccess; // DHT11
  if ((err = dht11.read(PIN_DHT, &temperature, &humidity, NULL)) != SimpleDHTErrSuccess) { // DHT11
    Serial.print("Read DHT11 failed, err="); Serial.println(err); // DHT11
    return; // DHT11
  }

  Serial.print((int)temperature); Serial.print(" *C, "); // DHT11
  Serial.print((int)humidity); Serial.println(" H"); // DHT11

  Homey.setCapabilityValue("measure_temperature", (int) temperature); // DHT11
  Homey.setCapabilityValue("measure_humidity", (int) humidity); // DHT11

}
void ldrloop() {
    wifi();
  Homey.loop();
  Serial.print("LDR waarde: ");
  Serial.print(analogRead( LDRsensor));
  Serial.println("");
  Homey.setCapabilityValue("measure_luminance", analogRead( LDRsensor));
  delay(1000); // wacht 1 minuut 60000 ms
}
void loop(){ // Beide
dhtloop();    //makes two separate voids, one per original code
co2loop();      //akes two separate voids, one per original code
ldrloop();      //akes two separate voids, one per original code
}
Testing
Now that you have successfully uploaded the code, we will test it to make sure it works. youdo this by opening the Serial Monitor in Arduino IDE, click on Tools and then Serial Monitor or use the keyboard shortcut CTRL+SHIFT+M.

Conclusion
Using these sensors and code you can build a well-functioning Multi sensor for a fraction of the normal costs, while having the possibilities to connect it to your Smart Home. Normally you would probably pay several hundred dollars for a similar sensor, while it only comes with a fraction of the options.
Link with mechanical ventilation
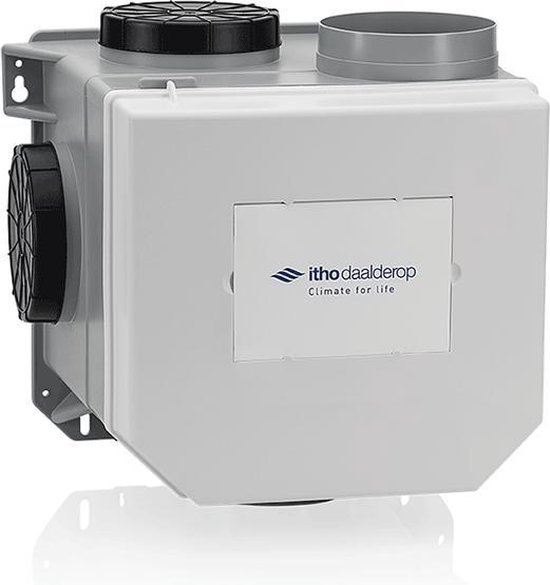
It is especially nice when you use this sensor in combination with mechanical ventilation, such as the system below from Itho Daalderop. This can also be linked to Homey via the Spider app .
When the CO2 concentration indoors gets too high, it can automatically start your mechanical ventilation via a ‘flow’. In this way you always have a healthy climate indoors.
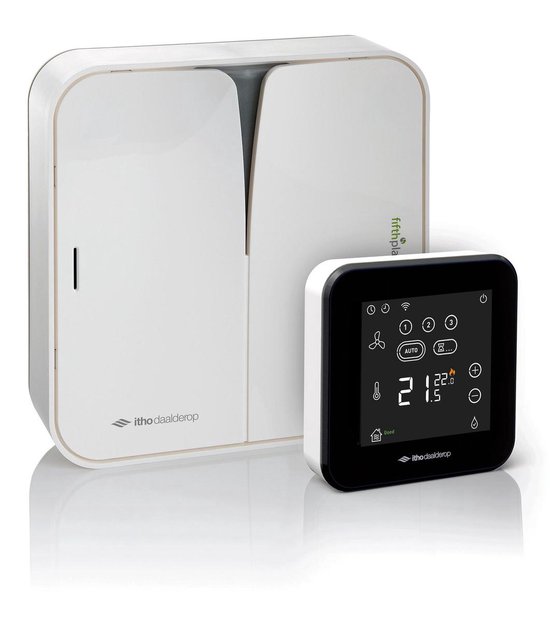
Spider thermostat and Gateway from Itho Daalderop , with which you can easily connect the mechanical ventilation with Homey
More projects coming soon! Sign up here so you don’t have to miss anything!
![Build your own Wifi operated water thermometer [Homeyduino – English version]](https://huisvanvandaag.nl/wp-content/uploads/2018/08/Vijver-1.jpg)
![Build your own CO2 sensor with Homeyduino [English version]](https://huisvanvandaag.nl/wp-content/uploads/2021/01/Homeyduino-Co2-sensor-800x450.jpg)
![Build your own Light sensor [LDR + Homeyduino – English version]](https://huisvanvandaag.nl/wp-content/uploads/2018/10/LDR-sensor.jpg)
![Build your own Clapper like switch [Homeyduino English version]](https://huisvanvandaag.nl/wp-content/uploads/2019/05/Clapper-Switch-Homeyduino.jpg)
