Build your own Clapper like switch [Homeyduino English version]
![Build your own Clapper like switch [Homeyduino English version]](https://huisvanvandaag.nl/wp-content/uploads/2019/05/Clapper-Switch-Homeyduino.jpg)
Who remembers this handy invention from the 80s-90s? The ‘Clapper’ switch. A switch that could turn devices on or off simply by clapping.
In the meantime surpassed by modern day technology, but at the time a futuristic piece of home automation. If you are not familiar with this, be sure to watch the legendary commercial:
As a project today we will be making a modern version of the ‘Clapper’ this time, because although it is an old concept, there are many modern applications for it. Certainly when you link it to Homey via Homeyduino , you can not only use it to turn devices on or off, but also use it to start or stop complete smart home ‘flows’.
This project will run on both the Homey Pro as well as on the Homey Bridge.
Supplies: on Amazon or Aliexpress:
- Microcontroller with WiFi and 5V: D1 Mini NodeMcu
- Micro USB Charger
- Sound sensor
- Homey Smart Home HUB with Homeyduino app installed
- Arduino IDE software
If you prefer to buy on Aliexpress, you can use these links:
Connection diagram
Follow the diagram below to connect the sensors to your board:
| Sensor | Wemos D1 Mini pin |
|---|---|
| OUT | D2 |
| VCC | 5V |
| GND | GND |

Arduino IDE
Install Arduino IDE, this is the software needed to put the code on your Wemos D1 Mini board. First we need to install the Homeyduino Library for this to work.
Open a new window, on the top bar click Sketch > Use Library > Manage Libraries.

In the screen that opens, search for Homeyduino and then click install.

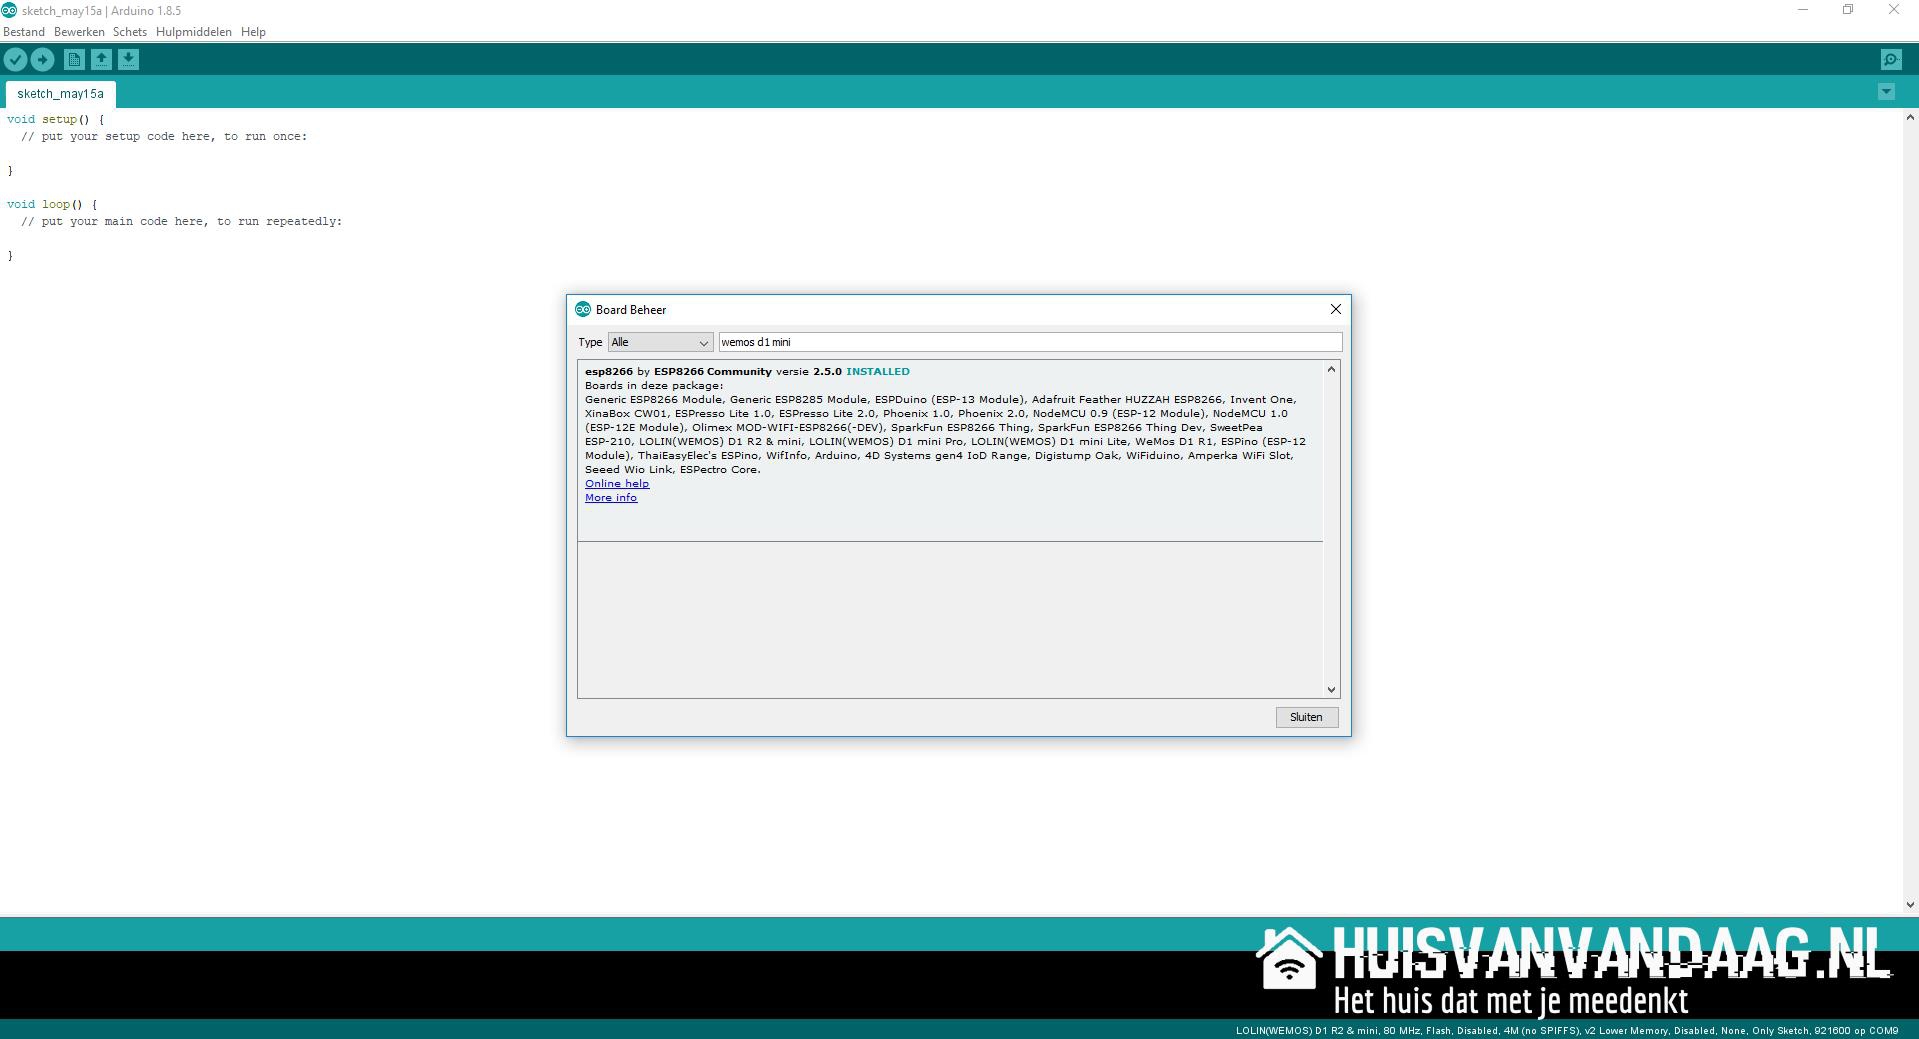
Look up: ESP8266 and install this as well.
Wemos D1 Mini board
You probably need to install this board before you can use it, so you can do this as follows:
Go to: Tools > Board > Board Management.
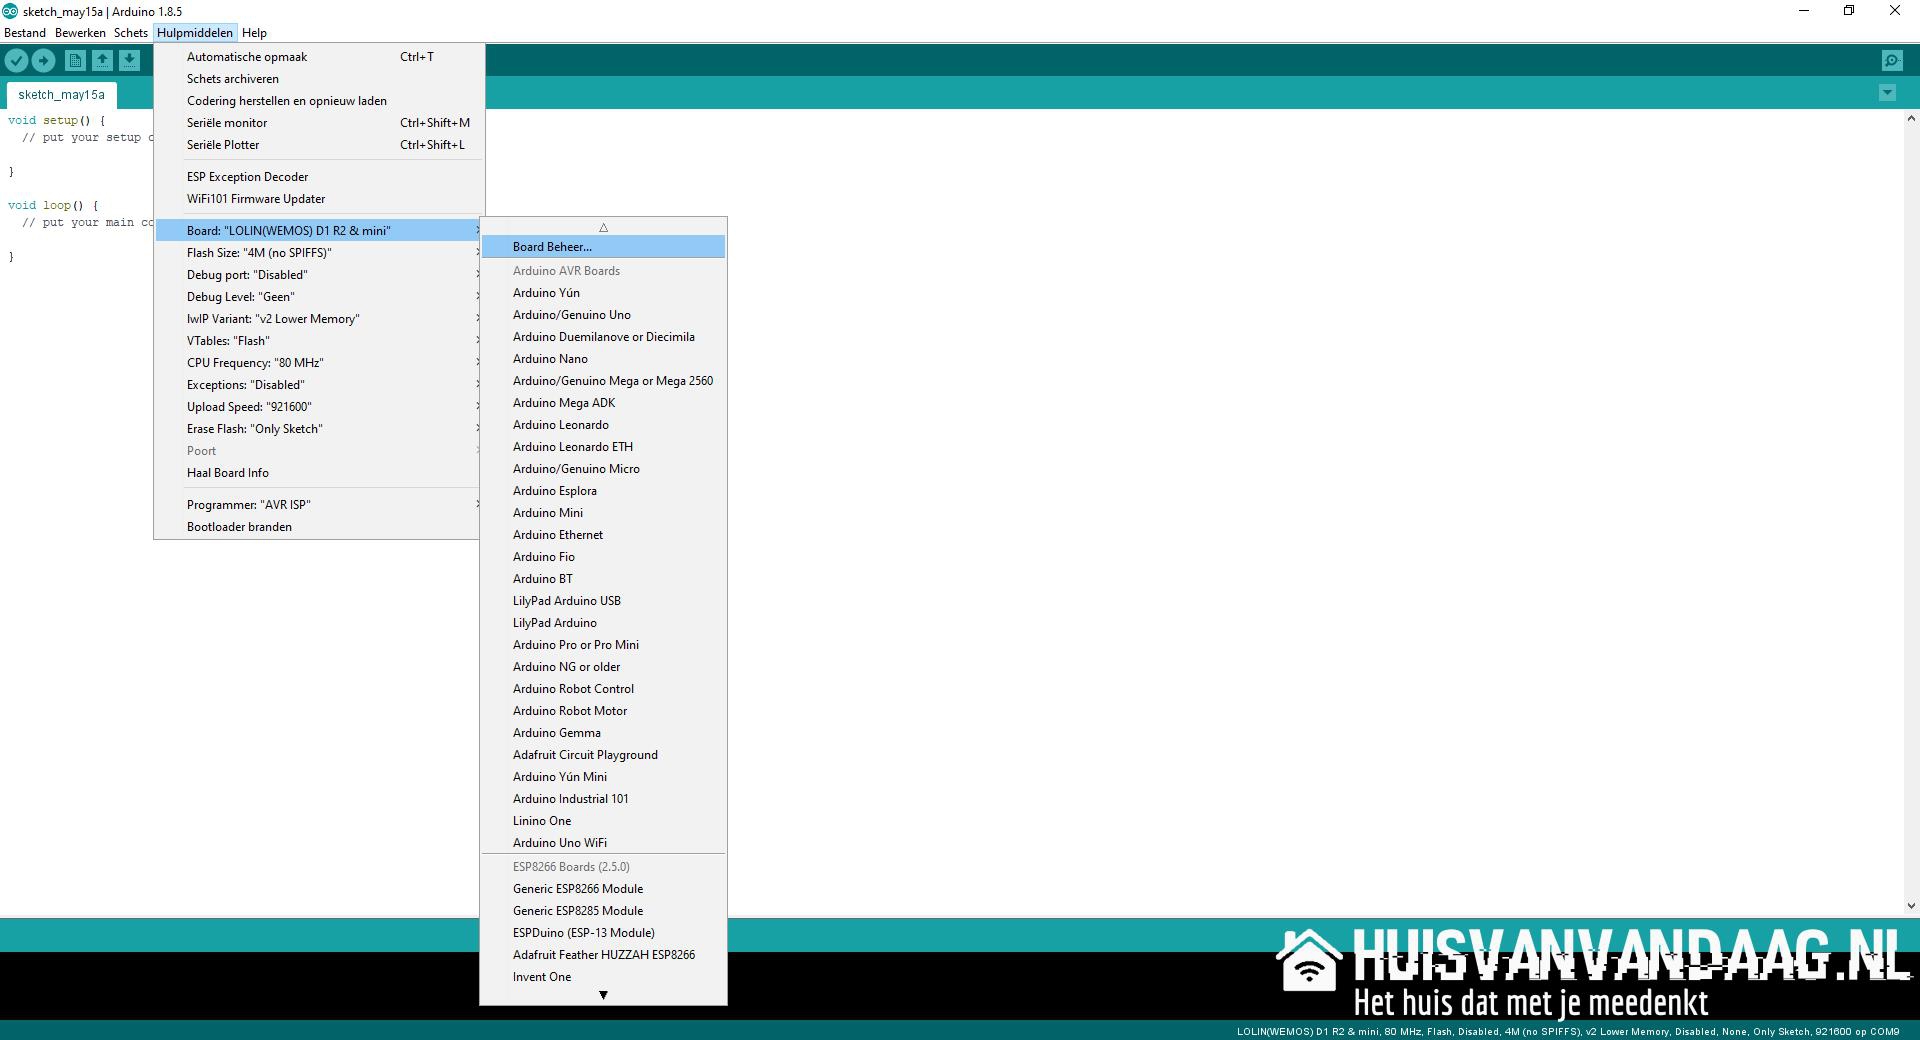
In the search window you then search for Wemos D1 mini and install it.
Homeyduino Code
When you have followed the steps above, open a new Arduino IDE screen and replace the text with the code below. Make sure you enter the correct network data here (see red text)
If you plan to place multiple Sound sensors in your house, it is important that you give them all a unique name, so that Homey recognizes them as different sensors.
// Code for Homeyduino made by Smart Home Blog https://huisvanvandaag.nl.
// Take a look at my site for more Homeyduino en other Smart Home projects.
// Original code: https://en.code-bude.net/2014/12/08/how-to-build-a-clap-switch-using-arduino/

#include <ESP8266WiFi.h>
#include <WiFiClient.h>
#include <Homey.h>

int soundSensor = D2;
int claps = 0;
long detectionSpanInitial = 0;
long detectionSpan = 0;
boolean ClapState = false;

void wifi() {
  if (WiFi.status() != WL_CONNECTED) {
    WiFi.begin("<SSID>", "<PASSWORD>");
    uint8_t timeout = 30;
    while (WiFi.status() != WL_CONNECTED) {
      delay(500);
      Serial.print(".");
      if (timeout<1) break;
    }
    if (WiFi.status() == WL_CONNECTED) {
      //Print IP address
      Serial.print("Connected to WiFi! (");
      Serial.print(WiFi.localIP());
      Serial.println(")");
    }
  }
}

void setup() {
 Serial.begin(9600);
  Homey.begin("Sound sensor"); // pick a name for your sensor
  Homey.setClass("sensor");
  pinMode(soundSensor, INPUT);
 }

void loop() {
   wifi();
  Homey.loop();
  bool clap_on = !digitalRead(soundSensor);
  bool clap_off = !digitalRead(soundSensor);

  int sensorState = digitalRead(soundSensor);

  if (sensorState == 0)
  {
    if (claps == 0)
    {
      detectionSpanInitial = detectionSpan = millis();
      claps++;
    }
    else if (claps > 0 && millis()-detectionSpan >= 50)
    {
      detectionSpan = millis();
      claps++;
    }
  }

  if (millis()-detectionSpanInitial >= 400)
  {
    if (claps == 2)
    {
      if (!ClapState)
        {
          ClapState = true;
        Serial.println("Light on");
        Homey.trigger("clap_on",true);
        }
        else if (ClapState)
        {
          ClapState = false;
        Serial.println("Light off");
        Homey.trigger("clap_off",false);
        }
    }
    claps = 0;
  }
}
Check if correct board is selected
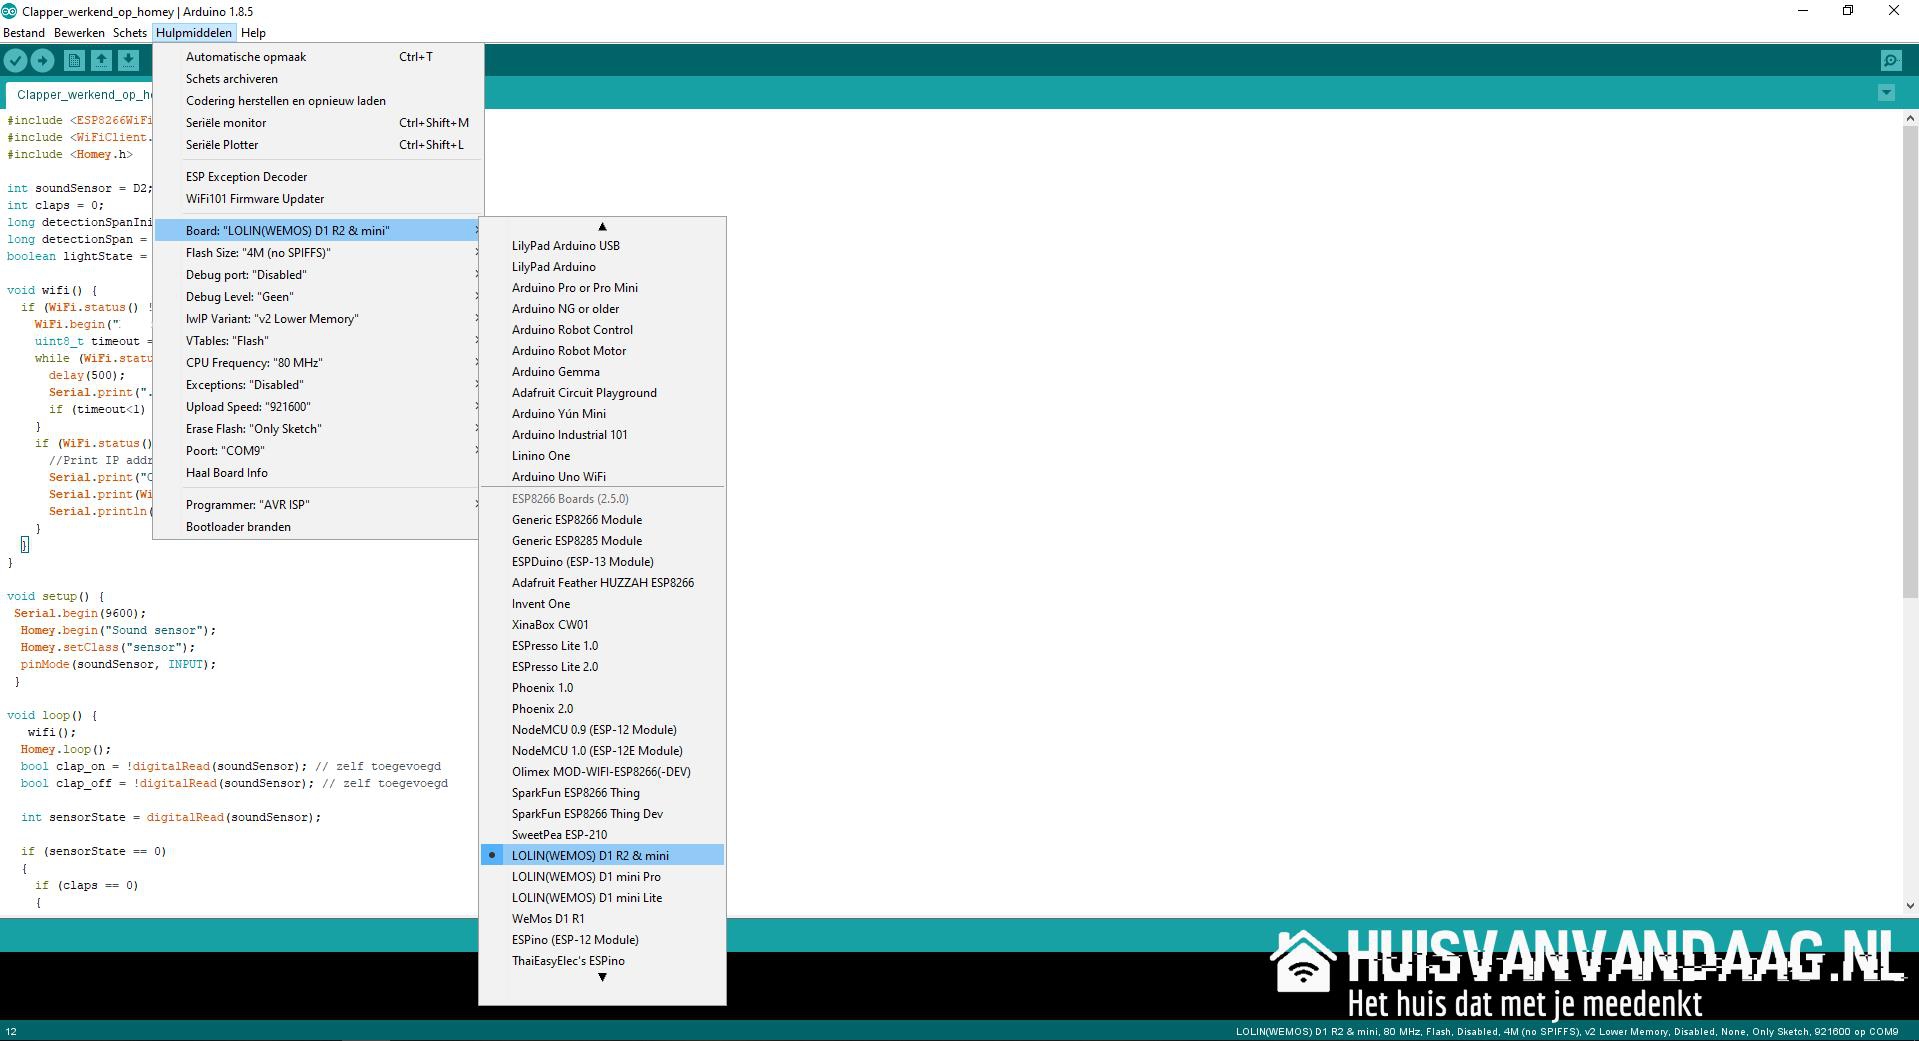
Before we write the code to the board, we have to check if we have selected the right board in Arduino IDE, otherwise you won’t get it to work. In our case that is the “LOLIN(Wemos) D1, R2 and Mini”
When this is all correct, we click on the arrow in the icon bar (second icon from the left) > Upload.
Testing the code
Now that you have successfully uploaded the code, we will immediately test it. We do this by opening the Serial Monitor in Arduino IDE, click on Tools and then Serial Monitor or use the keyboard shortcut CTRL+SHIFT+M.
A screen will then open on which you can read the values from the sensor. When you clap twice in a row this should be readable on the Serial Monitor. Also experiment with one or three claps, so you will see that the code is correct and will detect little or no false ‘claps’.

Linking it to Homey
You can now link the sensor to Homey via the Homey app.


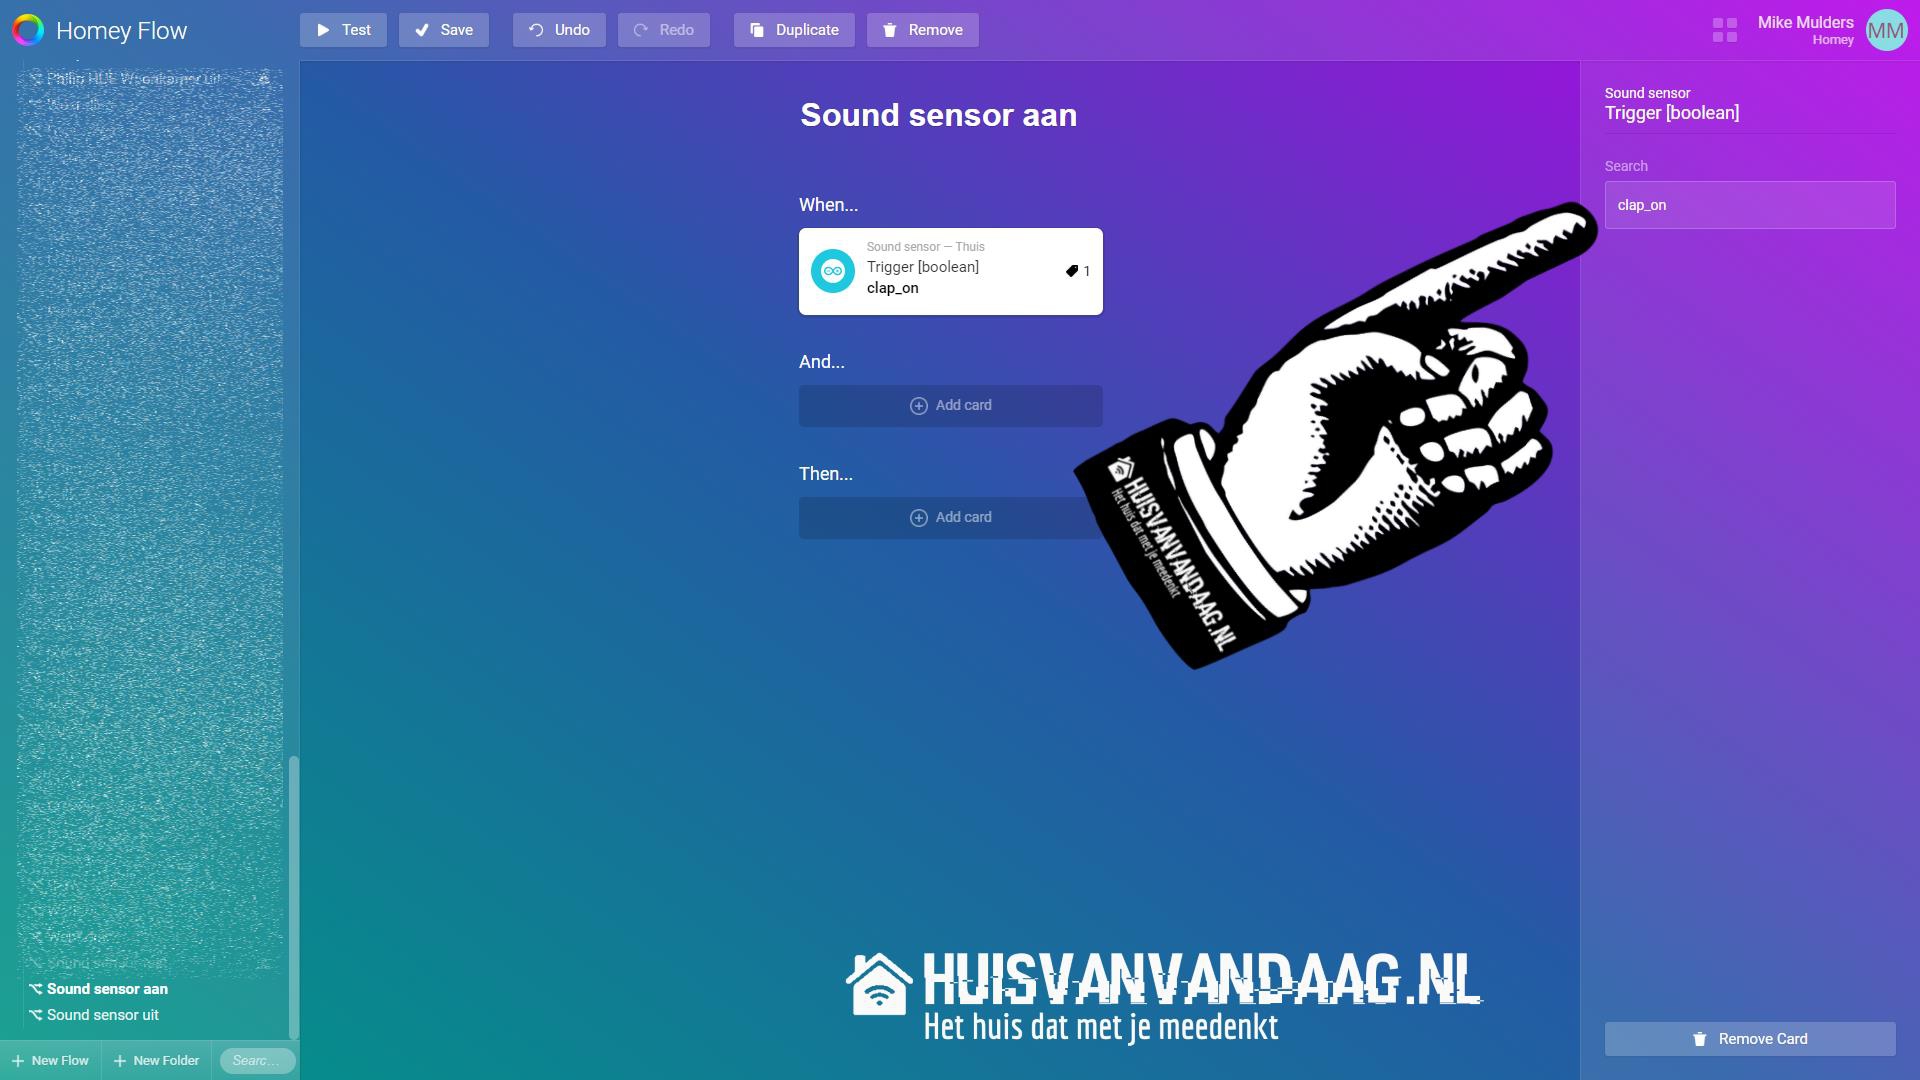
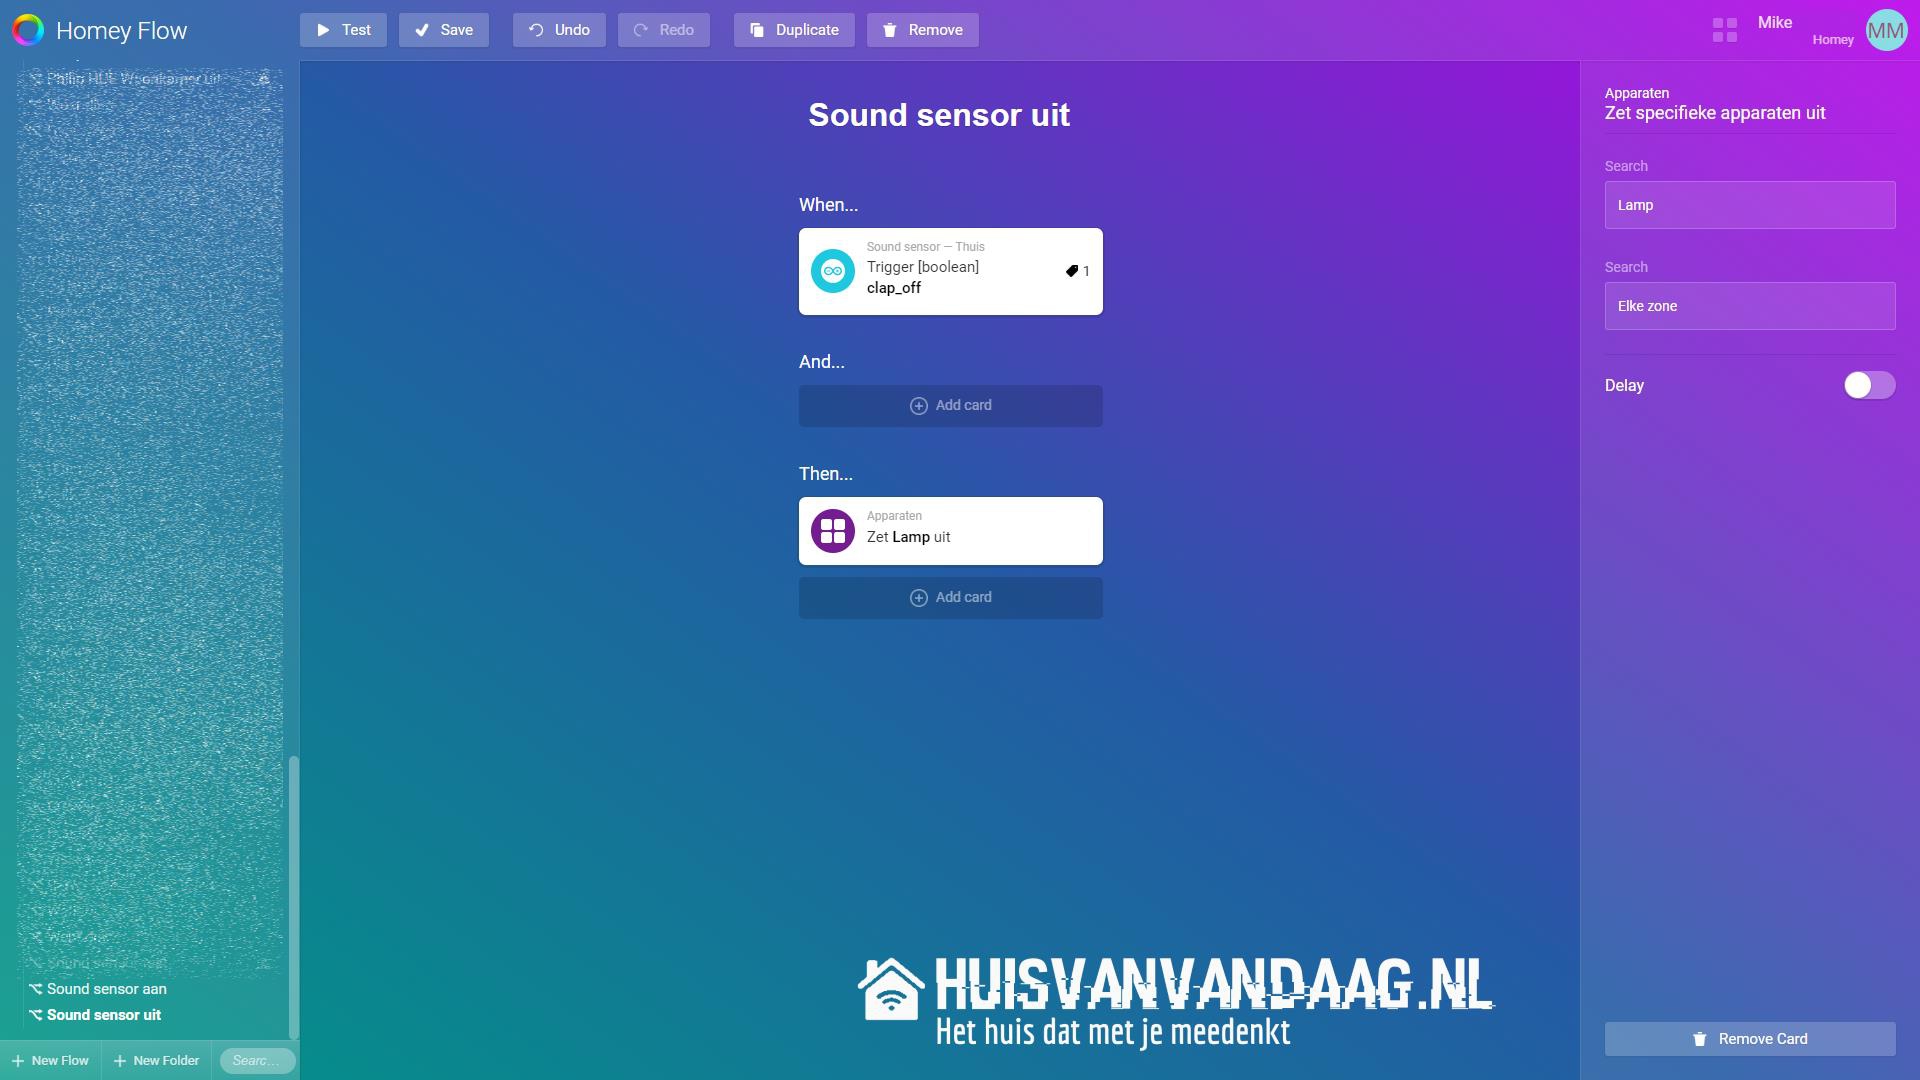
Homey example flow

Conclusion
Hopefully you’ve got your own ‘Clapper’ like switch working. If you know of any fun, crazy, funny or special applications for this, please leave a comment.
More projects coming soon! Sign up here so you don’t have to miss anything!
![Build your own Wifi operated water thermometer [Homeyduino – English version]](https://huisvanvandaag.nl/wp-content/uploads/2018/08/Vijver-1.jpg)
![Build your own CO2 sensor with Homeyduino [English version]](https://huisvanvandaag.nl/wp-content/uploads/2021/01/Homeyduino-Co2-sensor-800x450.jpg)
![Homeyduino multi sensor: Co2-LDR-DHT11 [English version]](https://huisvanvandaag.nl/wp-content/uploads/2021/01/Multi-sensor-Homeyduino-Co2-LDR-DHT11--800x450.jpg)
![Build your own Light sensor [LDR + Homeyduino – English version]](https://huisvanvandaag.nl/wp-content/uploads/2018/10/LDR-sensor.jpg)
